by Gareth McIlhatton, Senior Engineer
In the world of cloud computing, ensuring business continuity during unforeseen disasters is critical. Azure Site Recovery (ASR) is Microsoft’s disaster recovery solution designed to keep your applications running during outages. It supports replication and failover for Azure Virtual Machines (VMs), as well as on-premises VMware and Hyper-V virtual machines.
This blog provides a step-by-step guide on setting up ASR and performing a failover.
Introduction to Azure Site Recovery
Azure Site Recovery helps organisations maintain business continuity by automatically replicating workloads to a secondary region. In case of an outage, you can failover to the replicated environment and continue operations with minimal disruption.
Key Features of Azure Site Recovery
- Continuous replication of Azure VMs.
- Multi-region support for replication.
- Automated failover and failback capabilities.
- Customisable recovery plans.
Setting Up Azure Site Recovery
1. Create a Recovery Services Vault
- Login to the Azure Portal and search for Backup and Site Recovery.
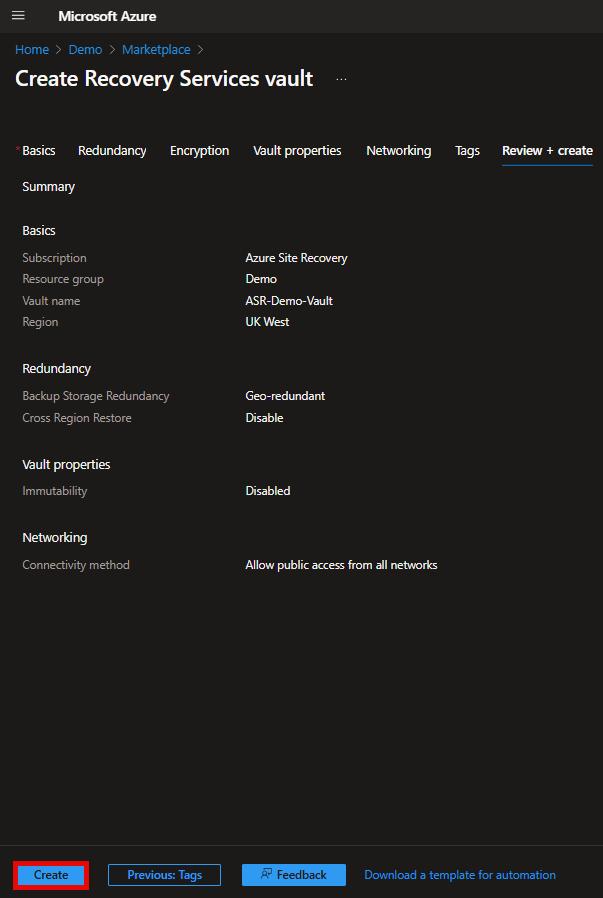
- Click on + Create and fill in the required details:
- Subscription: Select the appropriate Azure subscription.
- Resource group: Choose or create a resource group.
- Vault name: Enter a unique name for the vault.
- Region: Choose the region where the Recovery Services Vault will reside. It’s recommended to select the failover region (the region designated for disaster recovery) instead of the primary region hosting the active VMs. This ensures better resilience and optimized recovery in the event of a regional outage.
- Backup Storage Redundancy: Choose Geo-redundant or Locally-redundant – depending on your requirements.
- Cross Region Restore: Enable or Disable, depending on your requirements.
- Encryption type: Select Microsoft-managed or customer-managed, depending on your requirements.
- Connectivity method: Allow or Deny public access from all networks.
- Click Review + create and then Create.
2. Prepare Site Recovery
- Navigate to the newly created Recovery Services Vault.
- Under Overview, click on + Enable Site Recovery.
-
3. Enable Replication for Virtual Machines
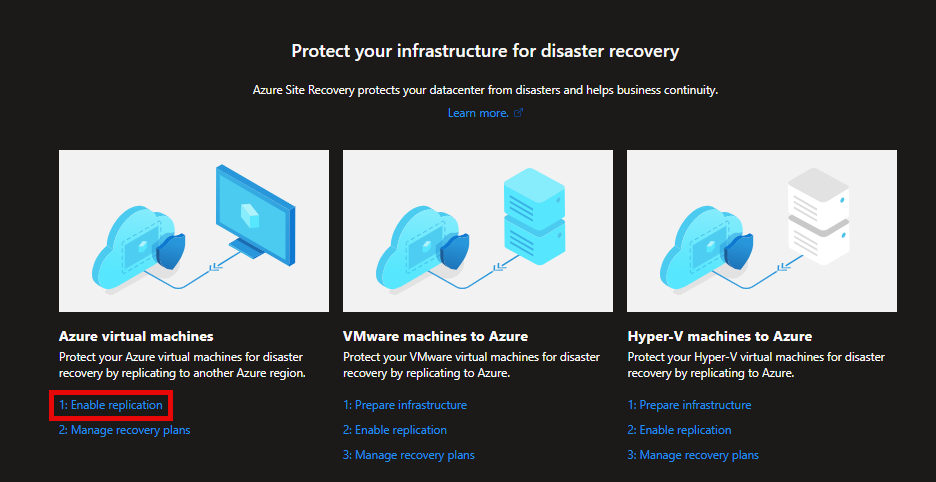
- Click Prepare Infrastructure and select 1: Enable replication under Azure virtual machines as the source.
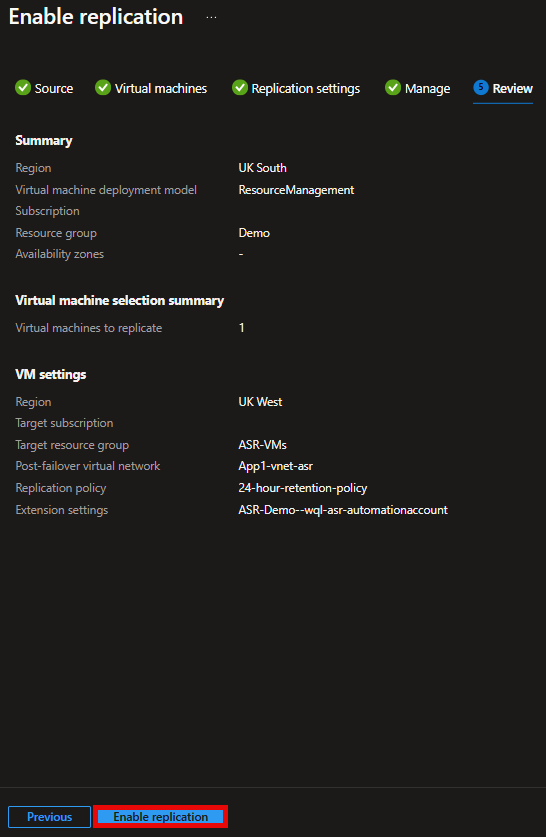
- Region: Select the location of where the azure VMs are running.
- Subscription: Select the subscription where the VMs are present.
- Resource group: Select source resource group where VMs are.
- Virtual machine deployment model: Select Classic or Resource Manager, depending on the source VMs.
- Disaster recovery between availability zones: Yes/No (only applicable if the VMs are deployed in a zone).
- Select the virtual machine(s) you wish to enable replication for.
- Enter the Location and Resource group settings:
- Target location: Select the location for the virtual machines to be replicated too.
- Target subscription: Select the subscription you want to use.
- Target resource group: Select the resource group to be used.
- Failover virtual network: Select or create a new VNet to be used in the failover region.
- Failover subnet: Create or select the subnet to be used in the replicated region.
- Replication policy: Create a new policy (0-15 days) or use the default 24-hour-retention-policy.
- Update settings: Allow ASR to manage.
- Automation account: Leave as new default account used for ASR.
4. Monitor Replication Status
- Once replication is enabled, go to the Replicated items tab in the Recovery Services Vault.
- Monitor the initial replication process. Depending on the size of the VM and network bandwidth, this may take some time.
- Ensure the replication status shows as Protected once completed.
Performing a Failover
Failover is the process of switching workloads to the replicated environment in the target region during a planned or unplanned outage.
Types of Failover
1. Test Failover: Used to validate your disaster recovery plan without impacting the production environment.
2. Planned Failover: Used during controlled maintenance or downtime, ensuring zero data loss or triggered during unexpected outages, ensuring minimal data loss by using the latest available recovery point.
Triggering a Failover
1. Test Failover
- Go to the Recovery Services Vault and select Replicated items.
- Click on the VM.
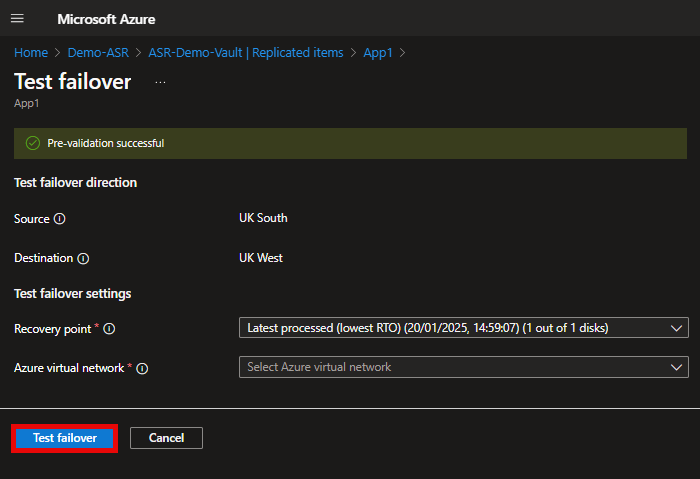
- Select Test Failover and choose a target virtual network.
- Click OK to start the test failover.
- Verify that the VM has started in the target region and is functioning as expected.
- After validation, click Cleanup Test Failover to remove the test environment.
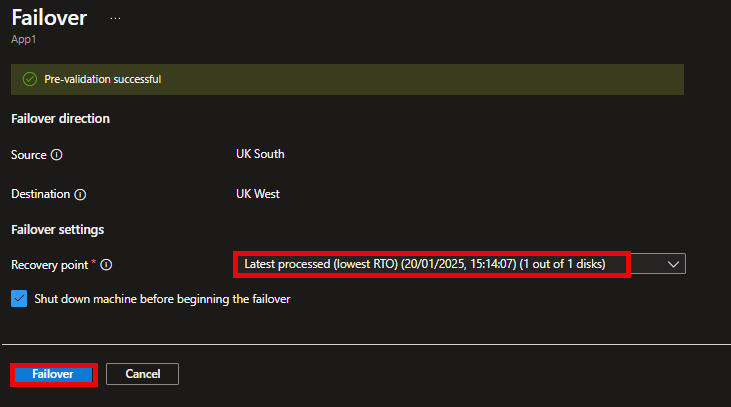
2. Planned Failover
- Navigate to the Recovery Services Vault.
- Select Replicated items and choose the VM.
- Click Failover.
- Once the failover is complete, verify the VM in the target region.
- Once verified, click Commit to confirm the failover.
- Click Re-protect to enable replication back to the original region.
Failback Process
After the primary region is restored, you may want to switch back operations. The failback process involves re-enabling replication from the target region to the primary region and performing a planned failover back.
Steps to Perform Failback
- Ensure the primary region is operational and ready to accept workloads.
- In the Recovery Services Vault, go to Replicated Items.
- Perform a Planned Failover back to the primary region.
- Once the failover is complete, verify the VM in the target region.
- Once verified, click Commit to confirm the failover.
- Click Re-protect to enable replication back to the original region.
Best Practices for Using Azure Site Recovery
- Regularly Test Failover: Schedule periodic test failovers to ensure that your disaster recovery plan works as expected.
- Monitor Replication Health: Continuously monitor the replication status to detect and resolve any issues early.
- Optimise Replication Settings: Configure replication policies based on your business’s recovery time objective (RTO) and recovery point objective (RPO) requirements.
- Keep Recovery Plans Updated: Update your recovery plans whenever there are changes to your environment.
Conclusion
Azure Site Recovery provides a robust solution for disaster recovery, ensuring business continuity with minimal downtime. By following the steps outlined in this guide, you can set up ASR for your Azure VMs and be prepared to handle outages effectively.
Have you implemented ASR in your environment? Share your experiences and insights in the comments below!
Gareth







0 Comments